

Service accounts and API keys are only supported by the new API.
Prerequisites
You need the Admin role in your organization to create and manage service accounts and API keys. Members and Editors can view them.Steps
1
Create a service account
-
Click the gear icon in the left menu to open Settings, then select Identity & access management.
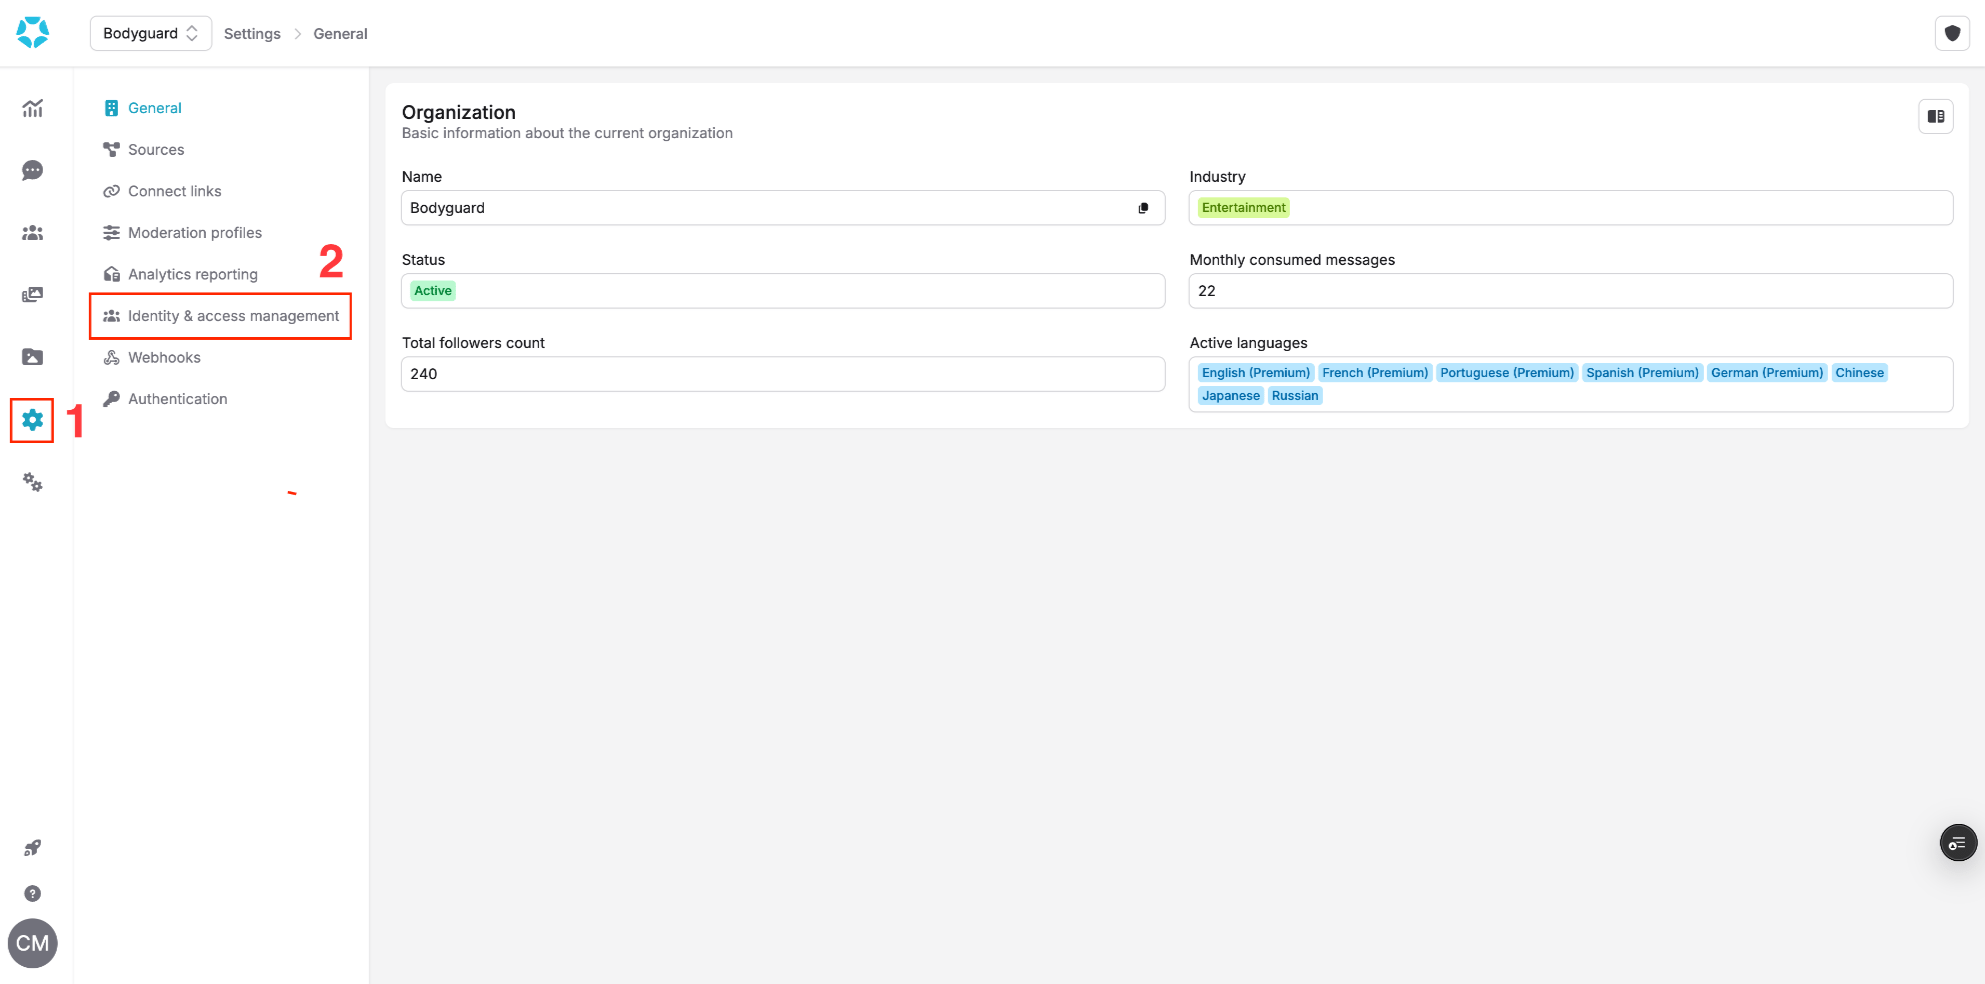
Settings > Identity & access management
-
Open the Service accounts tab and click Create service account.
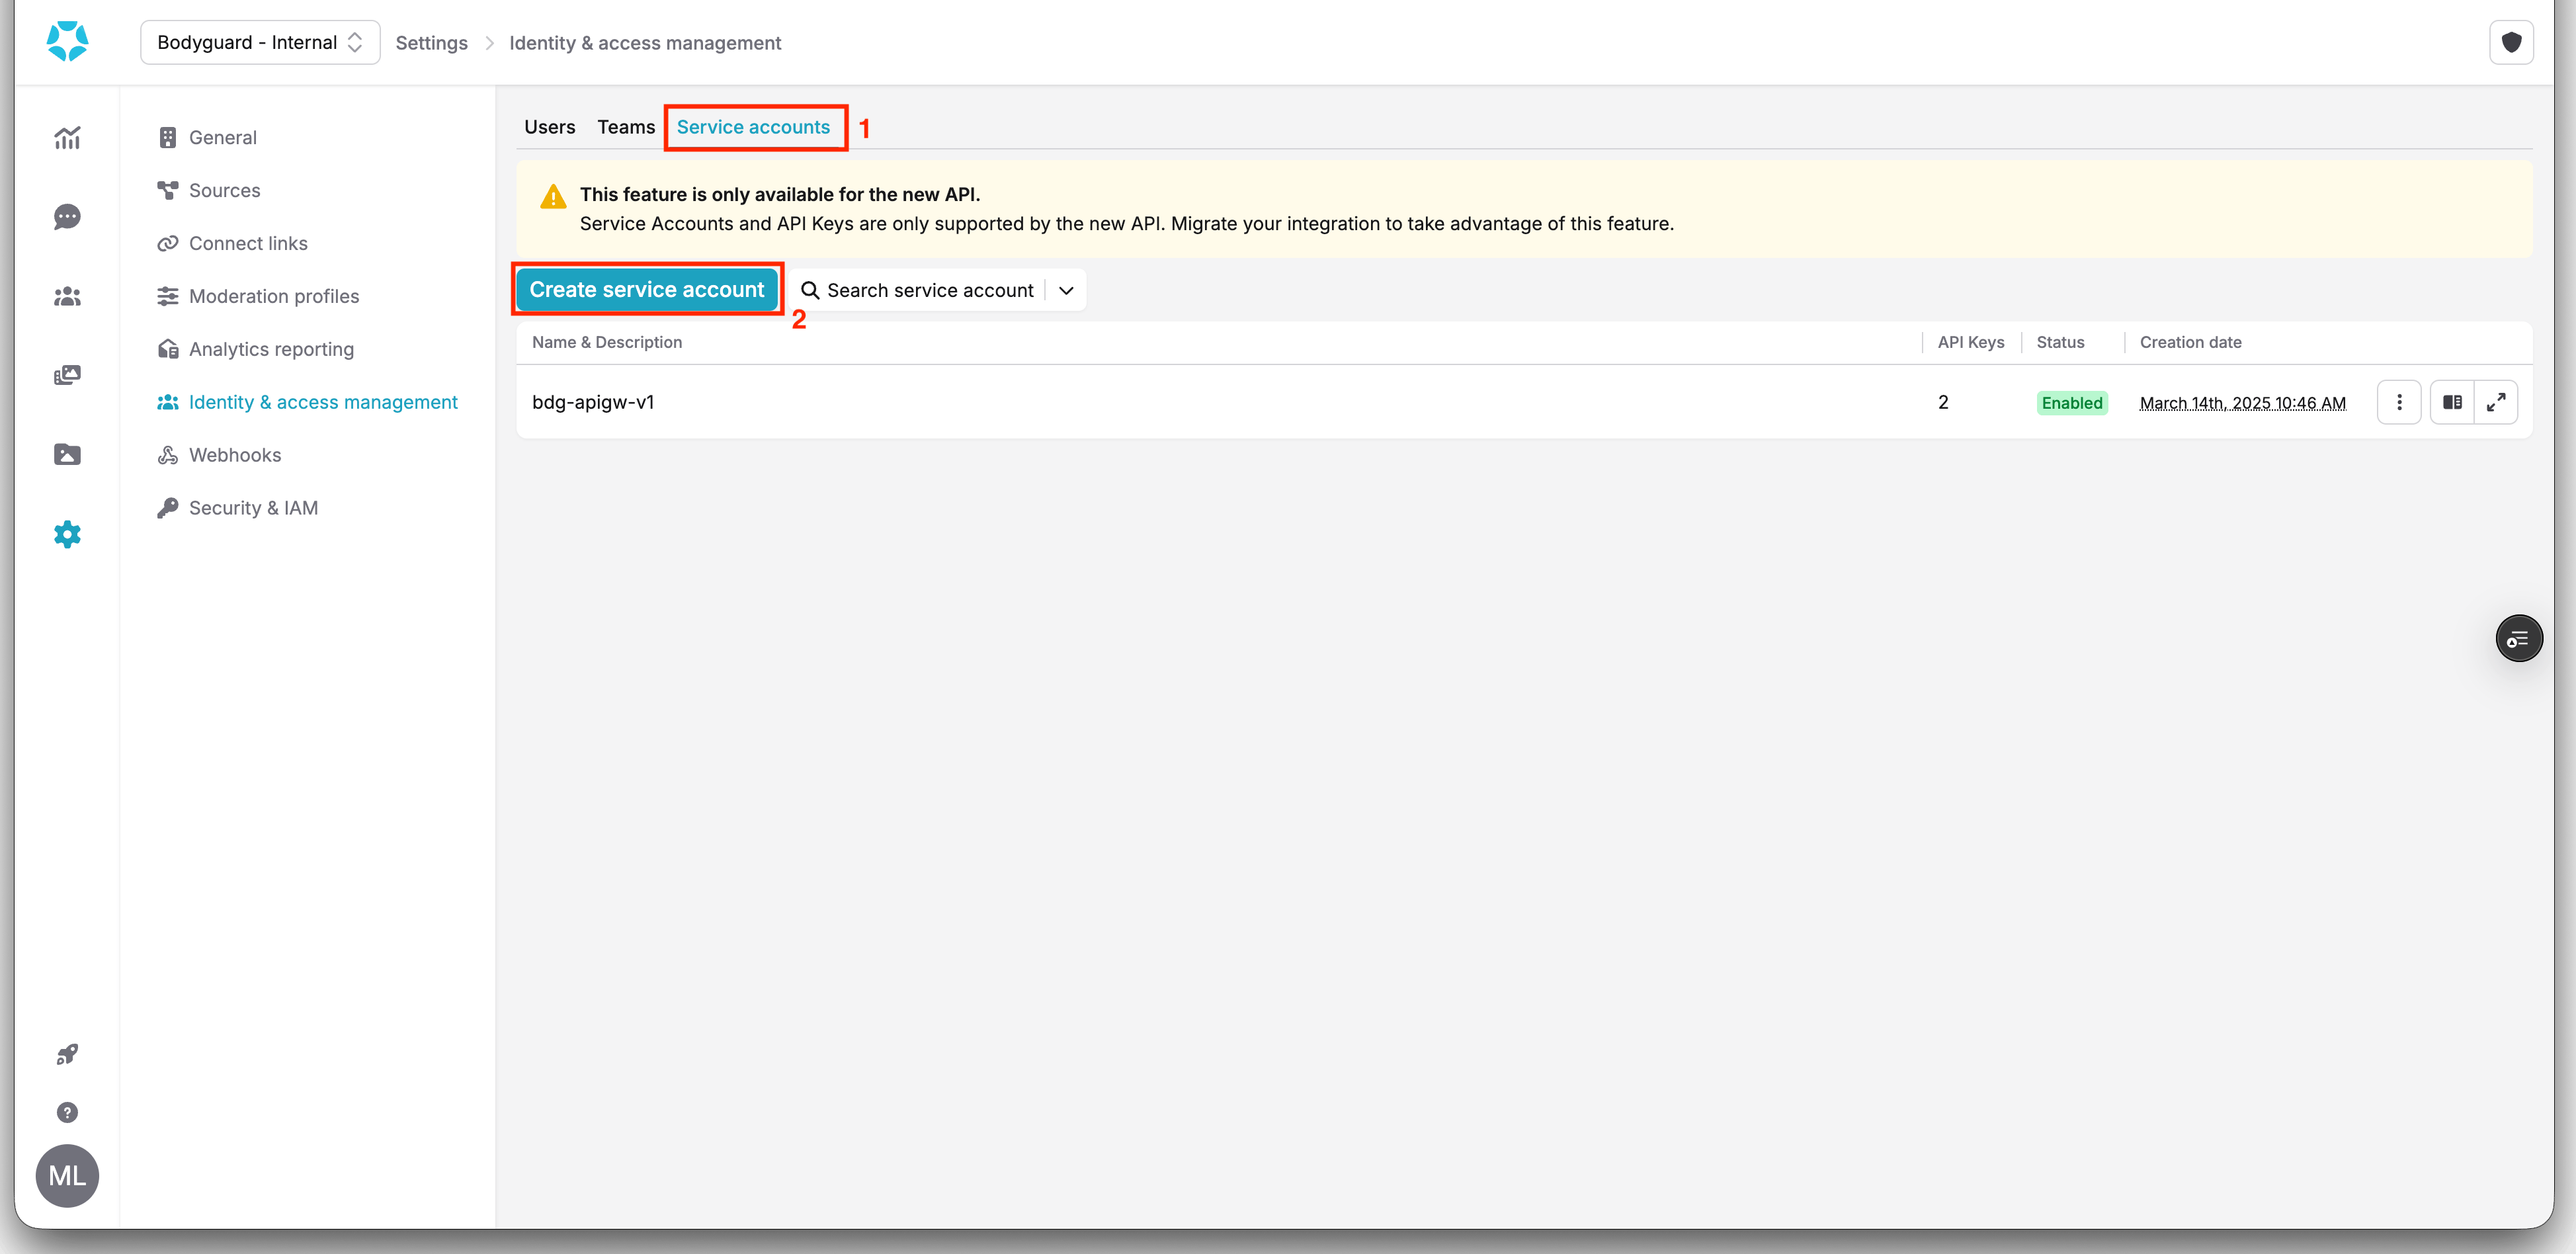
Service accounts tab
-
Fill in the form. The numbers match the screenshot below.
1. Enter a Name.
2. Add an optional Description.
3. Review the source access. Grant full source access is enabled by default: the service account can access all current and future sources.
4. Click Create.Use a clear name that identifies the application or environment using the account. For example, name it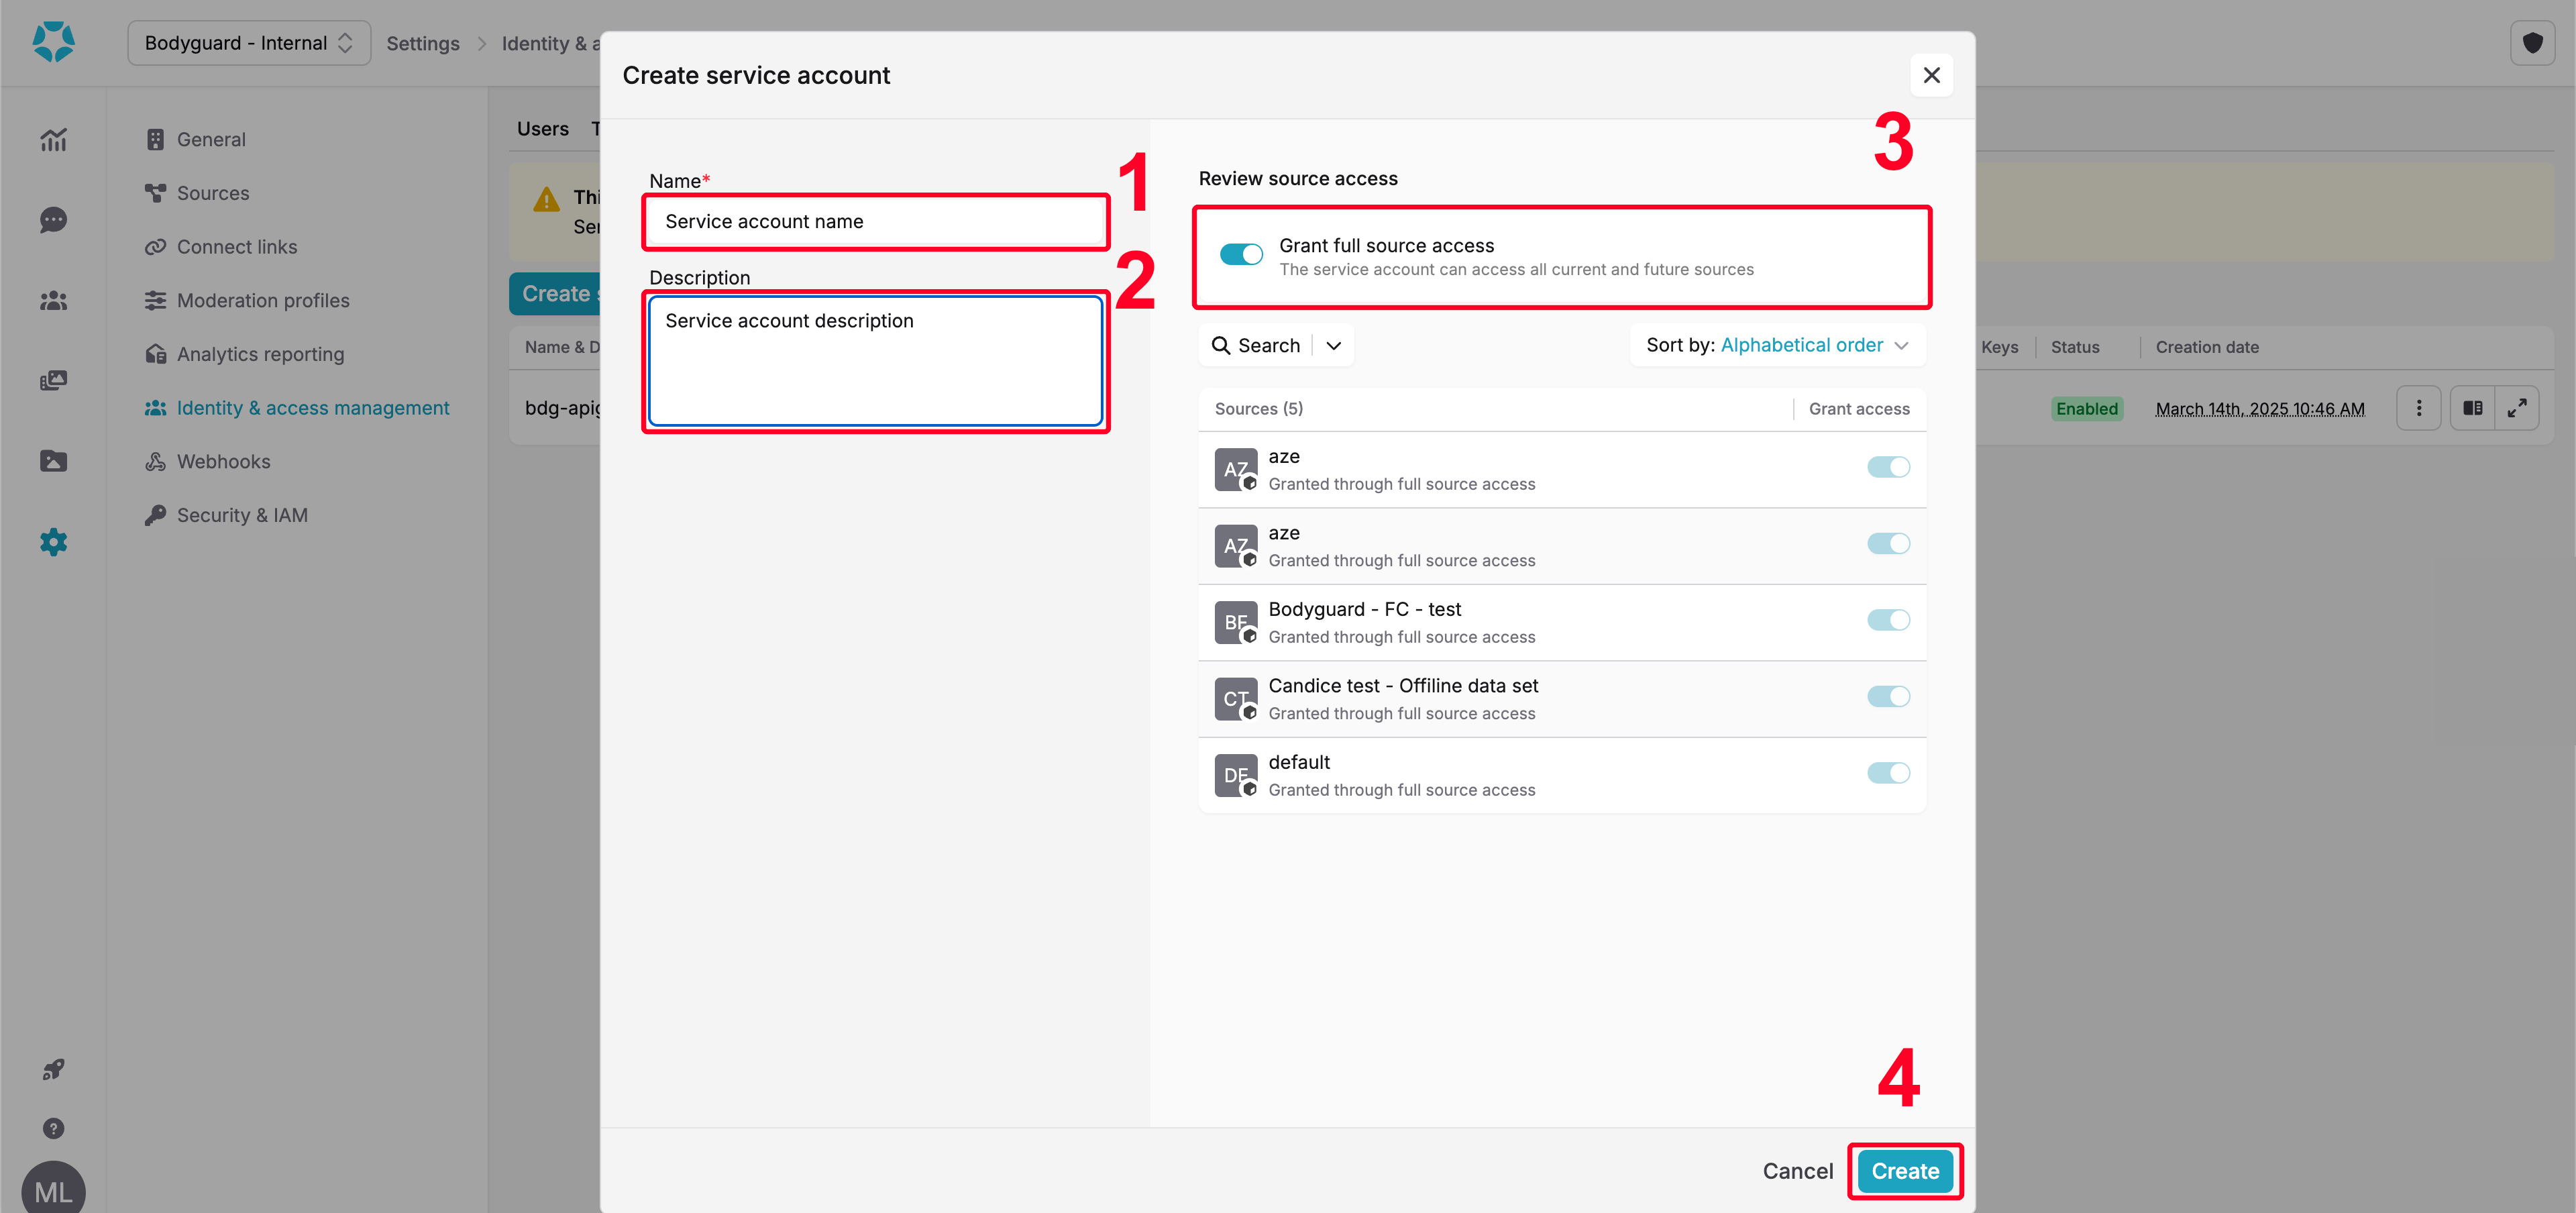
Create service account form
Production Monitoringand describe it asUsed by the production monitoring integration. -
Your service account appears in the list. Click the expand icon at the end of its row to open its details page.
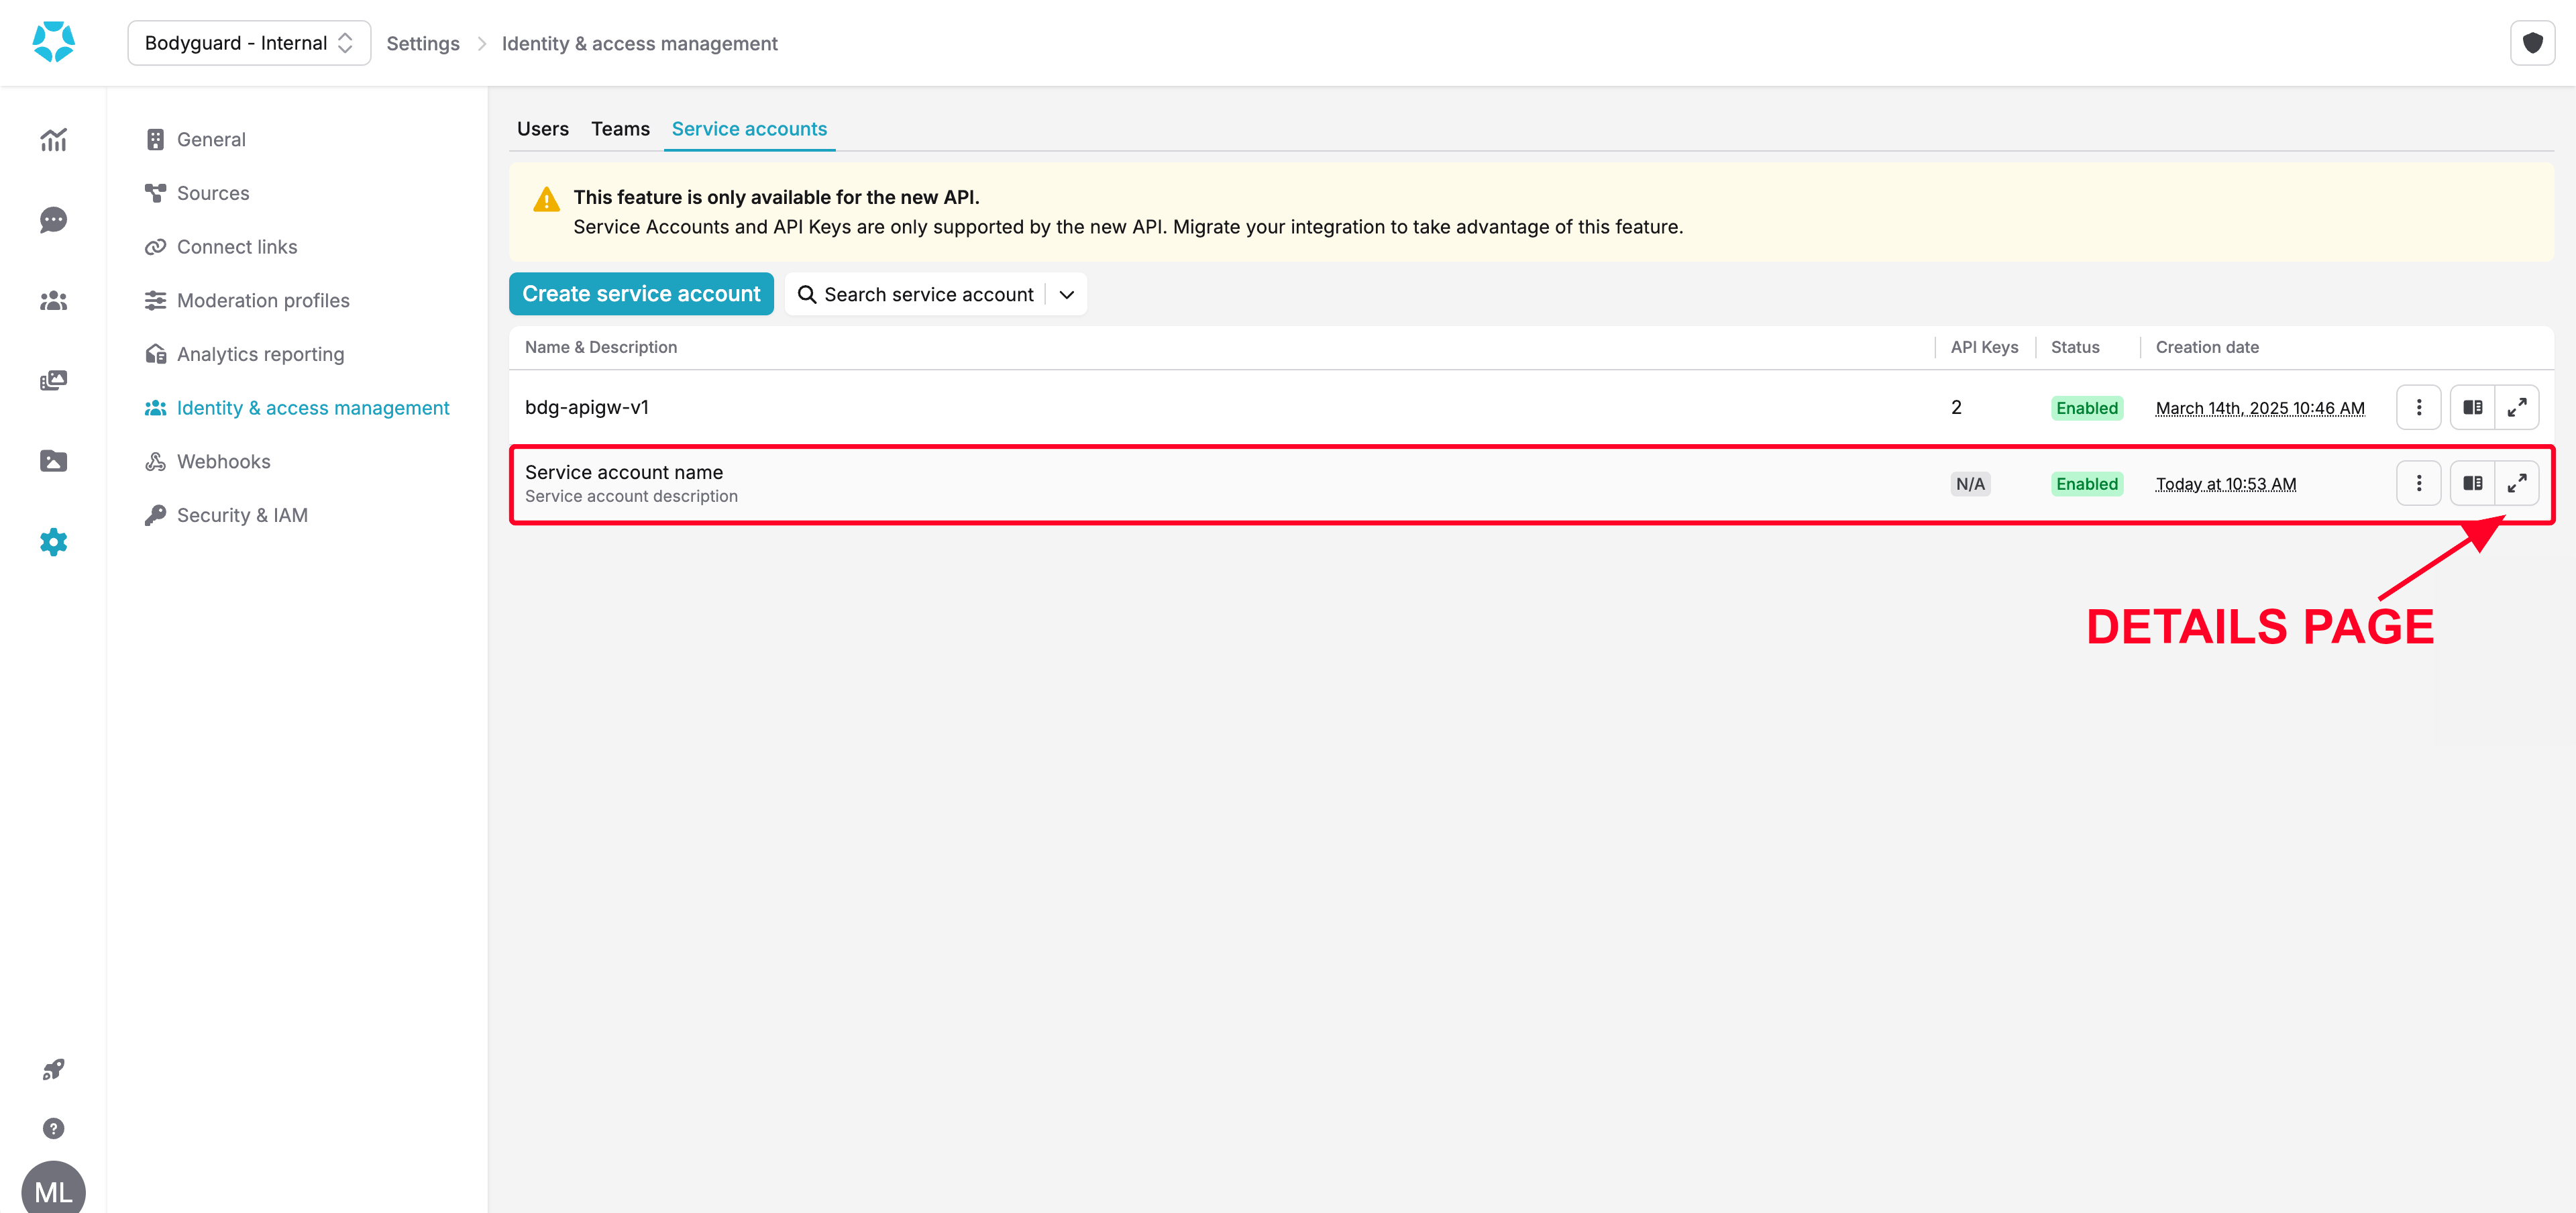
Open the service account details page
2
Generate an API key
-
On the service account details page, click Generate an API key.
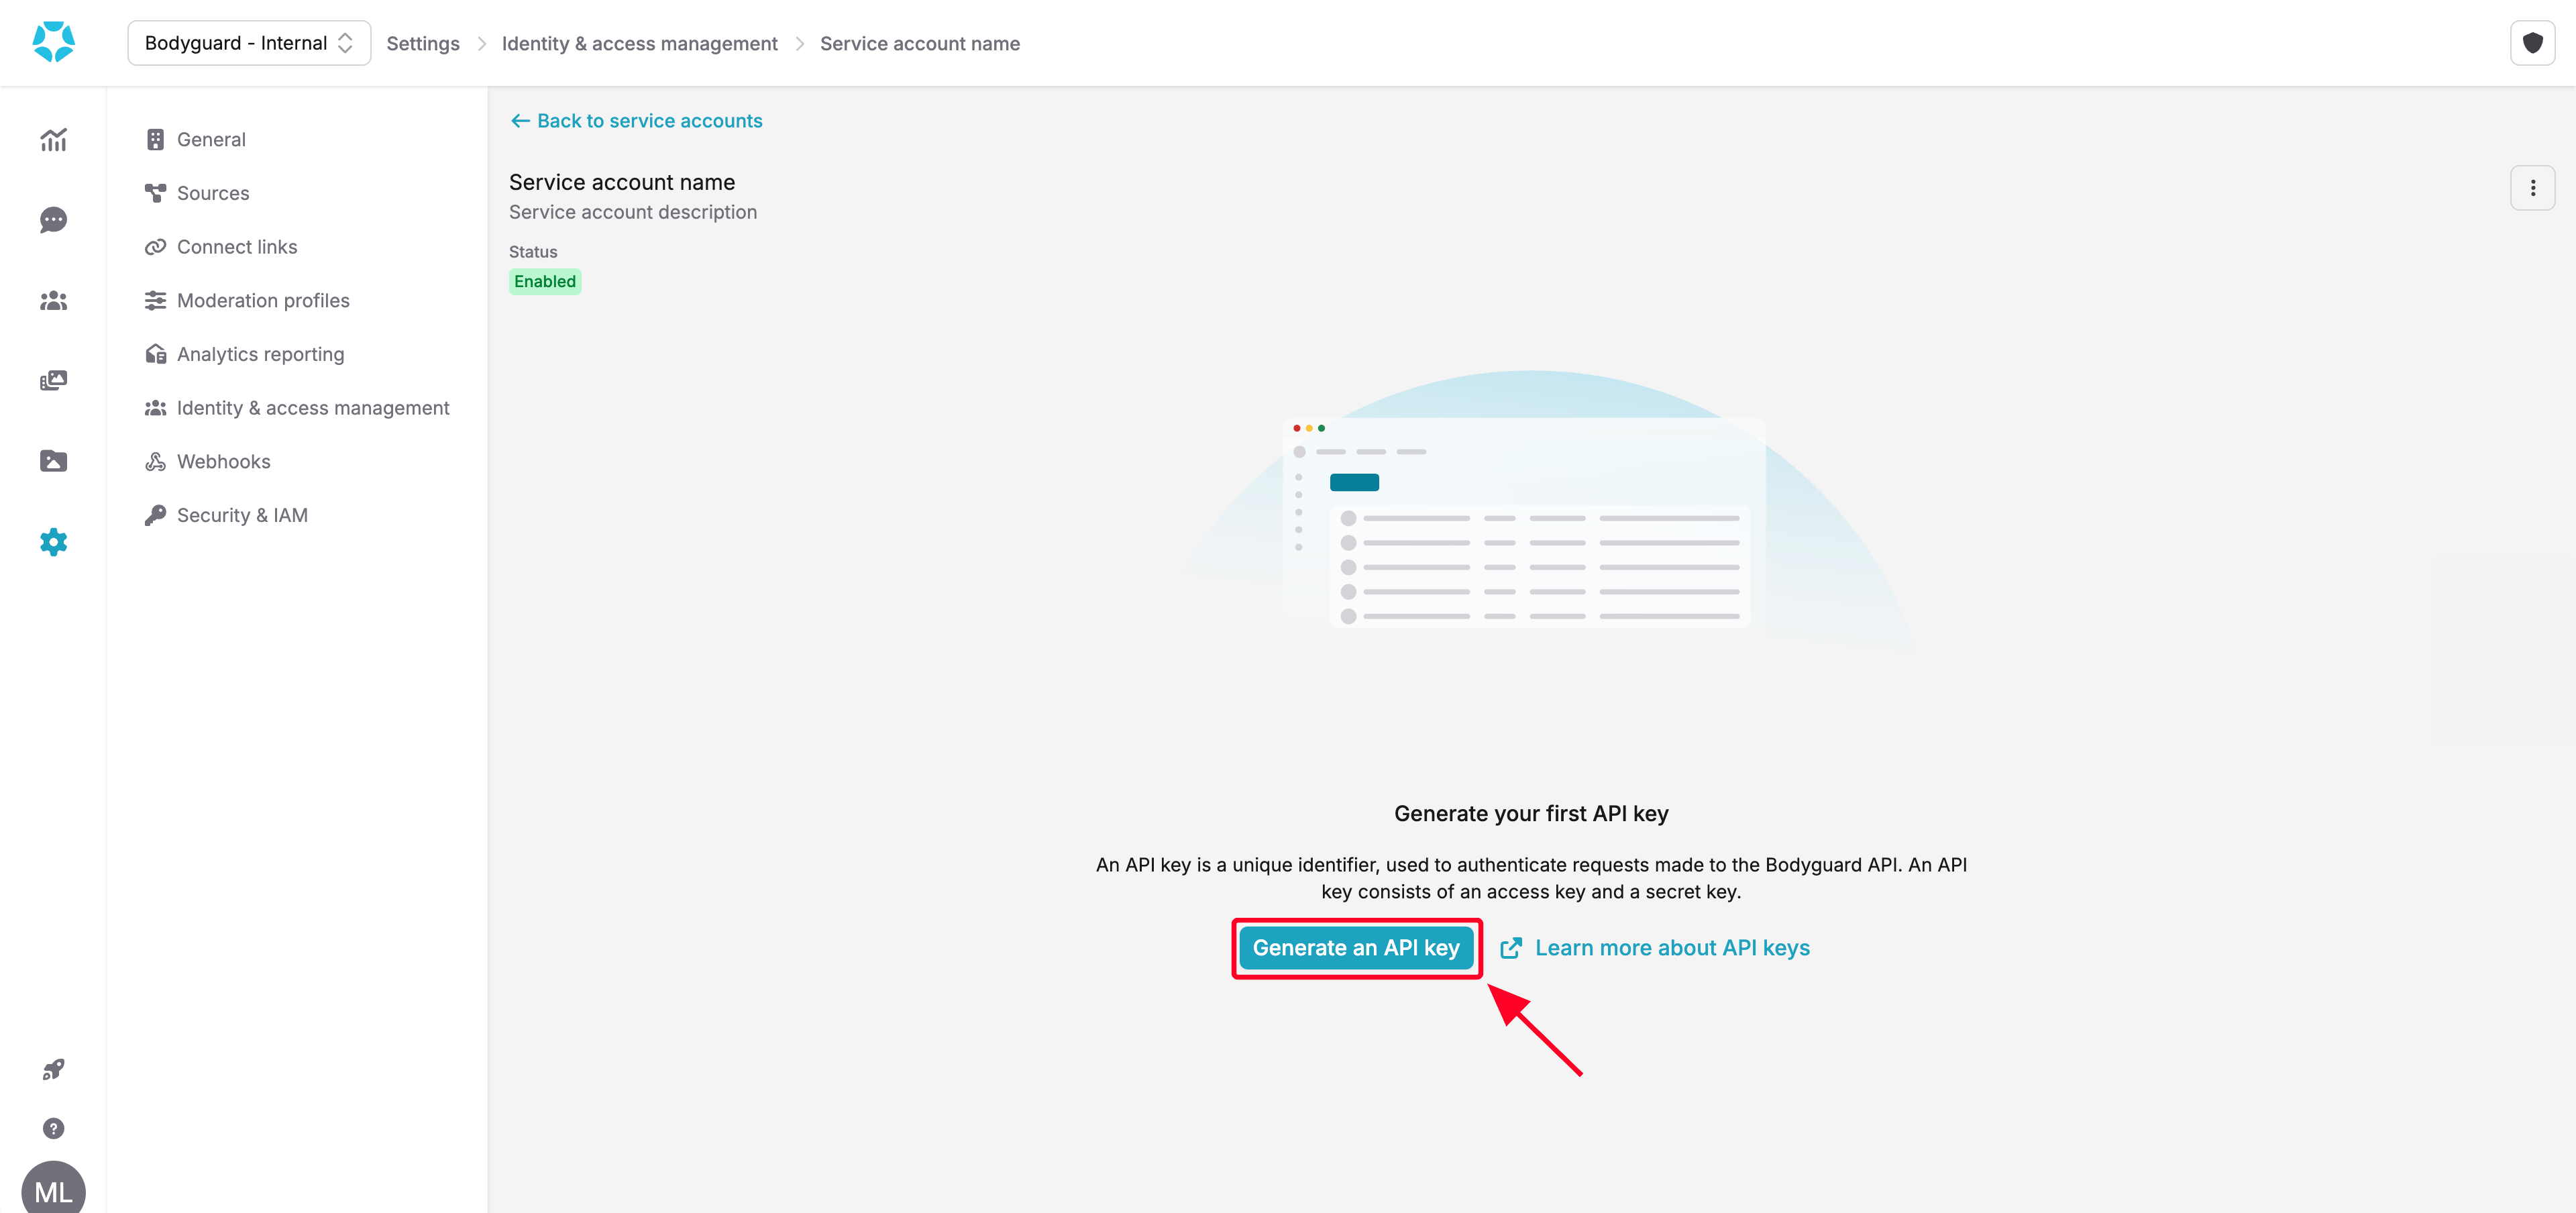
Service account details page
-
Enter a name and an optional description. To make the key expire, select Set an expiration date and pick a date. Then click Generate and continue.
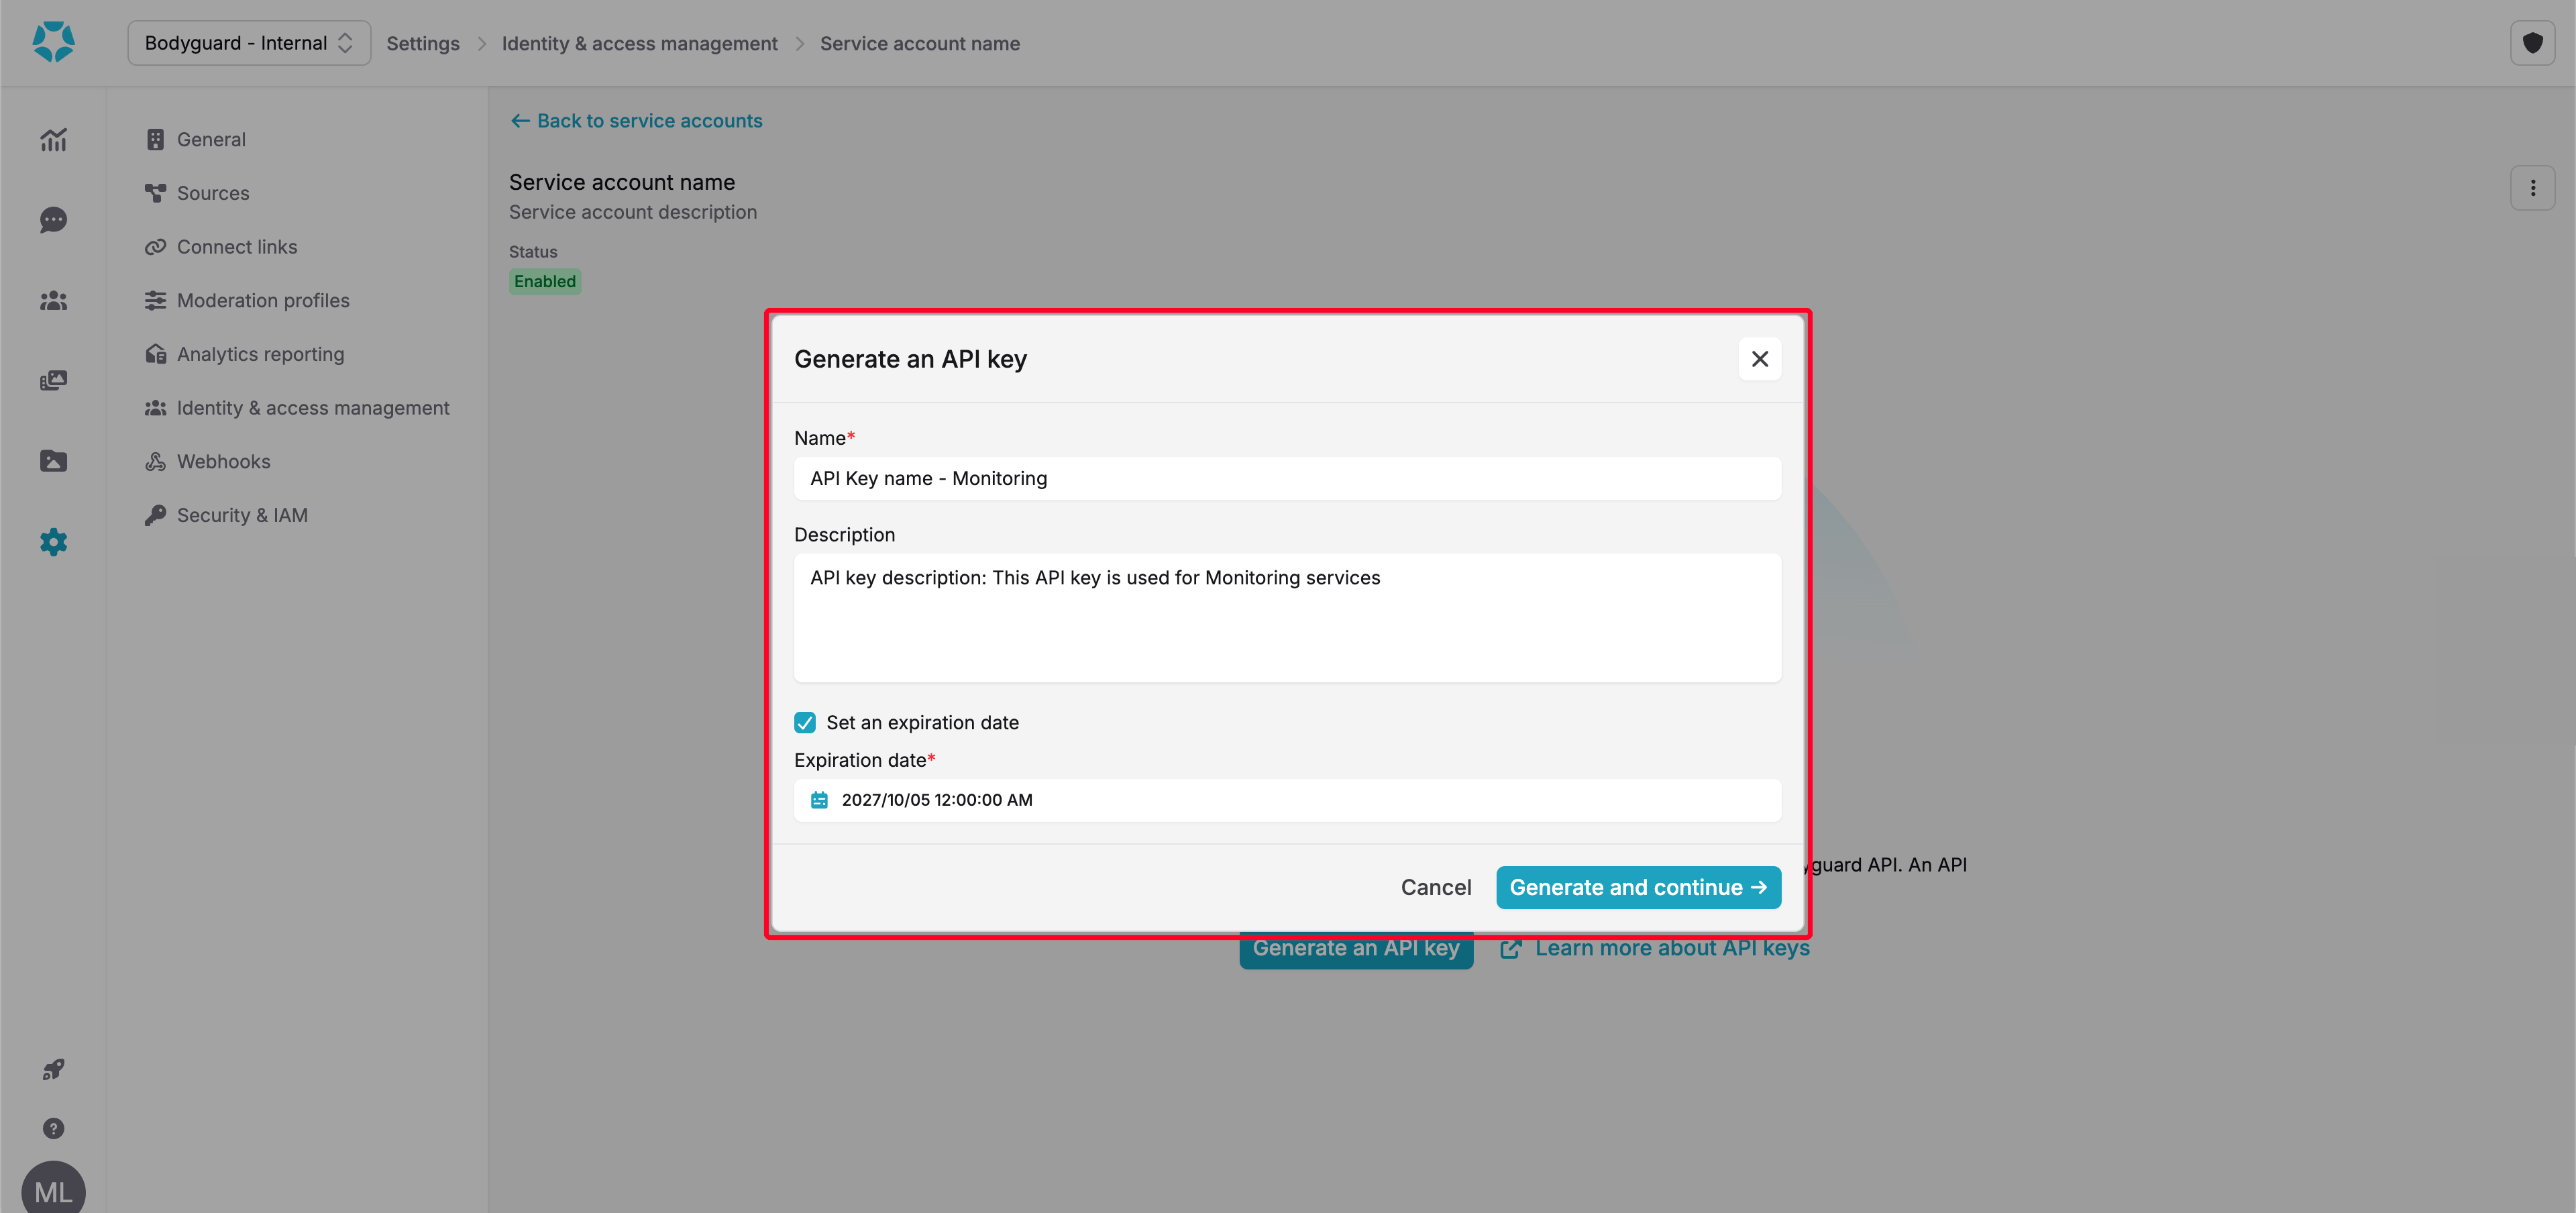
Generate an API key form
-
Copy your API key with the copy icon and store it securely, then click Done. The key is displayed only once, when you create it. You can’t display it again afterwards.
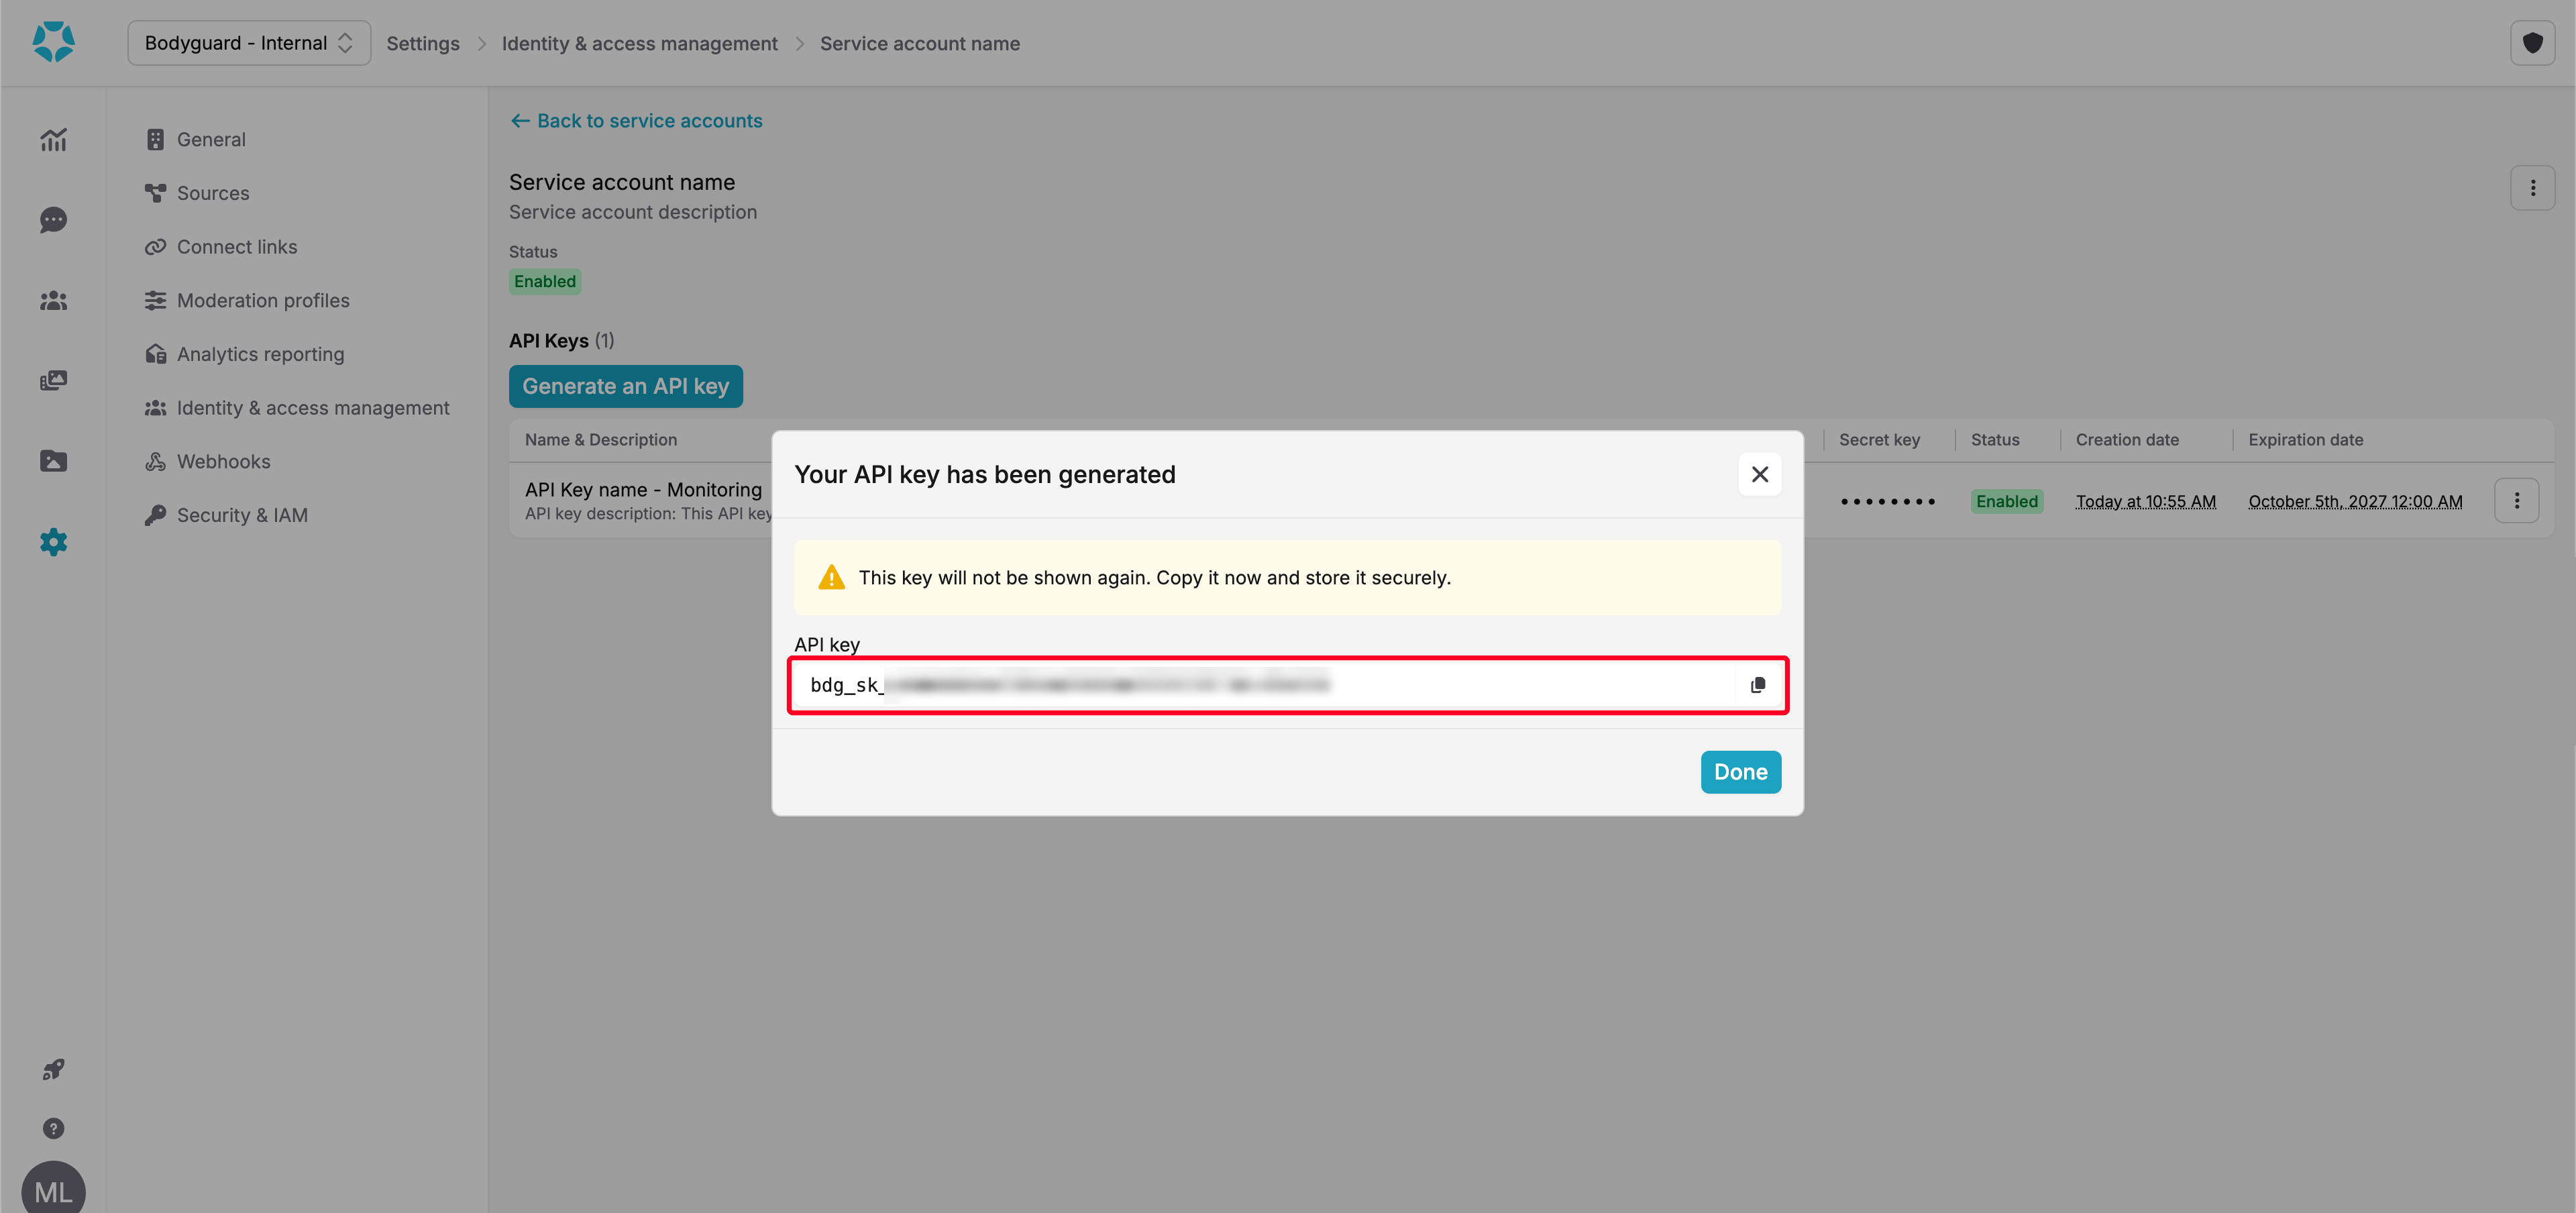
API key displayed at creation
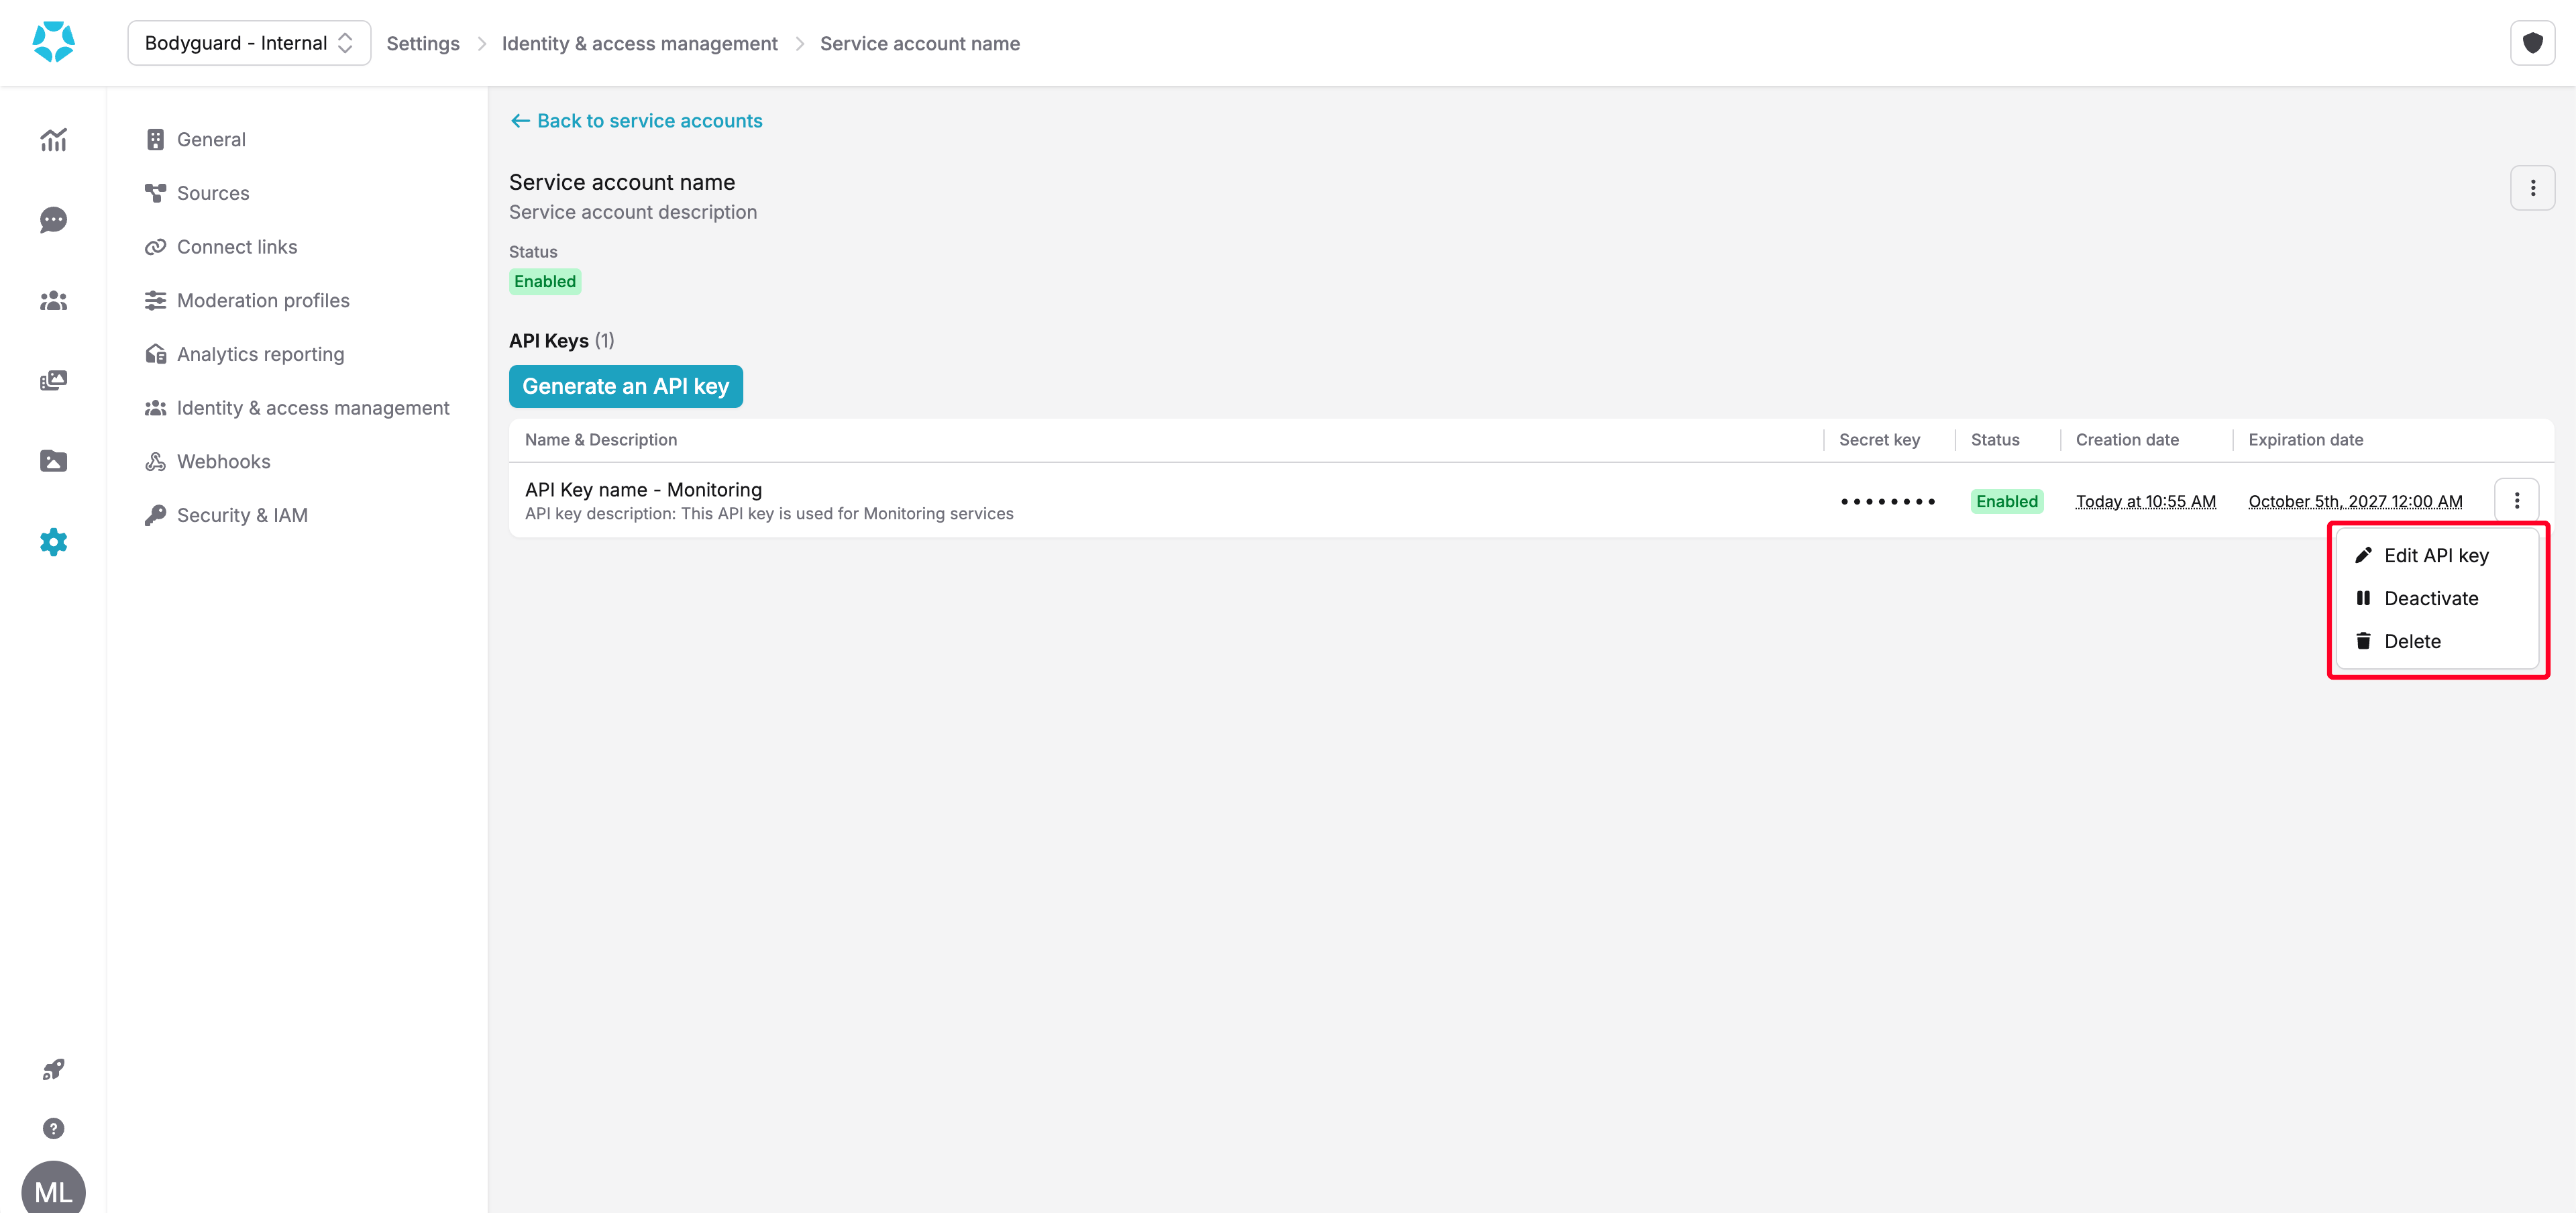
API key actions
3
Use your API key
Send the key in the See Authentication for the required headers and the authentication errors, and the Quickstart for a first request.
Authorization header of every request, using the case-sensitive ApiKey scheme:Authorization header
Next steps
API introduction
Authenticate and send your first request.
Connect your webhook
Receive notifications on your endpoint.